Superspark

a year in food and life

Mark Bittman’s oatmeal with soy sauce and scallions February 23, 2010

Filed under: breakfast — superspark @ 1:19 pm

I spent much of the last two years racing to get out of the house at 6 am to beat the LA traffic as I commuted the 25 miles to work.  There was barely time to brush my hair and teeth, let alone eat breakfast before hitting the road.  Instead I would have a graham cracker in the car to tide me over and then around 7:30 or so, have breakfast at work.  While I’m willing to pack and bring a lunch every day, packing breakfast just wasn’t an option so I went with the meal of highest convenience, something you can keep in your desk drawer indefinitely. Oatmeal.  Everyday.  Oatmeal with craisins. Every single day.  I longed to eat cereal, toast, anything but oatmeal.

So when we left the big city last June for a more relaxed suburban lifestyle, my old oatmeal habit quickly went out the door.  Yes, I still have a stash in my desk at work- just in case! In case of what, I have no idea.  In case the hospital’s three cafeterias all suddenly close and I’m unable to leave to get a meal elsewhere? In case for the first time in my life I forget to eat breakfast? Call it an irrational security blanket.

But for breakfast, our pantry is now stocked with all my favorite breakfast cereals- Shredded Wheat, Kashi Go-Lean Crunch, Honey Bunches of Oats, and so on.  Enchanted with my return to cereal, I hadn’t touched our big tub of oats until Cheap Healthy Good‘s recent reminder about this Mark Bittman recipe for oatmeal with soy sauce and scallions. I remember when it first came out (on Bitten? in the New York Times food section?) and though I was a little skeeved by the thought of a savory oatmeal, the idea stuck with me. Maybe, just maybe, it was worth trying once, just out of curiosity.

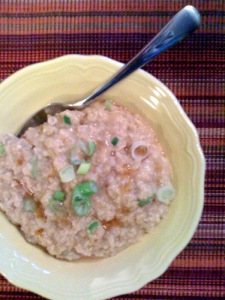
With the recipe’s recent resurgence in my memory, I finally set aside my cereal bowl and tried it last week. And you know what? I LOVED it. Loved. Loved. Loved. Although I steadfastly maintain my allegiance as a sweet breakfast lover (as opposed to you savory, omelette-loving folk), this dish single-handedly renewed my interest in oatmeal and I made it twice that very first week. Only marginally slower than regular oatmeal, it is infinitely more interesting. Don’t even think about skipping the sesame oil as that’s what really makes it memorable. Enjoy!

Oatmeal with soy sauce and scallions (serves 1)

Ingredients:
1/2 cup rolled oats
1 cup water
2 teaspoons soy sauce
1 tablespoon scallions for stirring, 1 teaspoon for garnish
1/2 tsp sesame oil

1. Combine water, salt, and oats in a medium saucepan and turn the heat to high. When the water boils, turn to low and cook, stirring frequently, until the water is just about absorbed (about 5 minutes).

2. Turn off heat, stirring in 1 tablespoon of scallions and soy sauce while the pot cools down. Sprinkle that last teaspoon of scallions on top for extra crunch and drizzle with the sesame oil.


Cranberry oatmeal scones January 18, 2010

Filed under: baked goods,breakfast,food — superspark @ 12:53 pm

We’re something of a TV watching household.  Yes, we like movies (though I still haven’t been out to one since Maddie was born oh, 18 months ago), but we are nearly always too tired to sit through an entire movie in an evening.  By the time Maddie goes to bed, we have maybe an hour or so of attention left in us before it’s time for us to go to bed in anticipation of our 4 am wakeup.  (Yes, you read that correctly, more on that in a minute…)

So when TV goes on hiatus, say, over the winter holidays because we’re all supposed to be busy with festive parties and family togetherness, we find ourselves revisiting old TV shows that we neglected to watch the first time around.   Most recently, it’s been Gray’s Anatomy, Season 5.  We had watched the previous seasons only slightly behind schedule, but as Season 5 approached, we had just had enough of the groan-inducing, eye-rolling melodrama of the show.  Sometimes it’s fun and sometimes it’s just too much to stomach.

Now that Dylan is a full-fledged surgical resident (an intern, just as the Gray’s Anatomy crew were in their first season), we have a decidedly different perspective on the show and its, uh, creative take on the medical profession.  I won’t even get into the OR issues (loose hair, lack of face masks, etc…) or the fact that all of the doctors are sleeping with one another.  No, what really gets us is the schedule our beloved TV doctors enjoy.

Meredith, Izzy, and the others routinely lounge around in their sun-filled house drinking coffee and relaxing before work in the morning.  Even in the height of summer, the sun isn’t up when Dylan and his fellow interns head to work.  When you have to be at work by 5, there’s just no room for morning chatting.  He’s lucky to find a moment to grab a portable breakfast before rolling out the door.  This one really irks him, needless to say.

What irks me the most? That he has virtually no control over his schedule at this point.  His three vacation weeks were chosen for him in advance with no input from him.  And he gets to request 5 days off (weekend included, mind you, as surgeons typically work 6 days a week) at either Thanksgiving or Christmas.  We requested Christmas off.  We got Thanksgiving.  Surprise!

All of which goes to say that for the first year ever, I was unable to spend Christmas with my parents and extended family.   Instead, Dylan, Maddie, and I spent the day on our own- after he got home from work at noon, that is.  In fact, we were lucky that he was able to trade or he would have been on call at work ALL DAY on Christmas.  Yeah, that’s what it’s like being a surgical intern.  All glamour and glory.

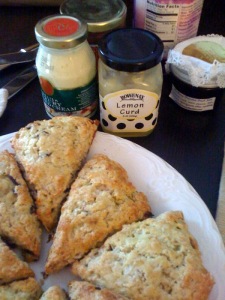
One of my family’s few Christmas traditions is making scones on Christmas morning and then eating them while we open our stockings.  In an effort to try to keep this year’s unusual Christmas at least a little festive, I whipped up a batch of these cranberry oatmeal scones from Joy of Baking on Christmas eve, popped them in the freezer unbaked, and then stuck them in the oven the moment Dylan walked in the door on Christmas day.  May I mention what a genius idea freezing unbaked scones is? Thank you, Smitten Kitchen! You can do all of the prep ahead of time and just whip them straight from freezer to oven at your convenience. Voila!

All in all, Christmas wasn’t quite the same as in previous years, but the scones were our best ever- moist, rich, and delicious, especially laden with jam, lemon curd, and clotted cream.  (It was Christmas people, time to live a little!) Yum.   If all goes well we’ll be bringing these delicious scones with us when we go visit my parents for Christmas next year.

Cranberry oatmeal scones (makes 8 medium scones)

Ingredients:
1 3/4 cups (245 grams) all purpose flour
1/3 cup (65 grams) granulated white sugar
1/4 teaspoon salt
3/4 teaspoon baking soda
1 teaspoon baking powder
1/2 cup (113 grams) (1 stick) unsalted butter, cold and cut into small pieces
3/4 cup (60 grams) old-fashioned rolled oats
1/3 cup (40 grams) dried cranberries or cherries (raisins or currants)
Zest of one lemon or orange (we skipped this)
2/3 cup (160 ml) buttermilk

Egg Wash: (not sure this added anything- I’d skip it next time)
1 large egg
1 tablespoon milk or cream

1. Preheat the oven to 375 degrees F (190 degrees C) and place rack in center of oven. Line a baking sheet with parchment paper (or use Silpat) and set aside.

2. In a large mixing bowl place the flour, sugar, salt, baking soda, baking powder and whisk to combine. Add the butter and using two knives or a pastry cutter cut in the butter until it resembles coarse crumbs. Add the rolled oats, dried cranberries and zest. Mix until combined. Stir in the buttermilk (adding more buttermilk if necessary) and mix just until the dough comes together. It will be fairly dry.

3. Transfer to a lightly floured surface and knead the dough four or five times and then pat, or roll, the dough into a circle that is 7 inches (18 cm) round and about 11/2 inches (3.75 cm) thick. Cut this circle into 8 triangular sections. Place the scones on the prepared baking sheet. Make an egg wash of one beaten egg mixed with 1 tablespoon milk or cream and brush the tops of the scones with this mixture.

4. Bake for about 15 – 18 minutes or until lightly browned and a toothpick inserted in the middle comes out clean. (Add just 3-5 extra minutes if baking frozen scones.) Remove from oven and then turn your broiler on high. If you like, sift confectioners (powdered or icing) sugar heavily over the tops of the scones and place them under the broiler. Broil for just a few seconds, turning the pan as necessary, until the sugar has melted and turns golden brown. Make sure to watch the scones carefully as the sugar will burn very quickly. Transfer to a wire rack to cool.
 

Gingerbread pancakes with butterscotch apples December 10, 2009

Filed under: breakfast,Dessert,food — superspark @ 3:24 am

Ah, iPhone, how I love you! While your camera is not exactly a fancy-schmancy Nikon D-70,  the ease and convenience are a godsend for those of us who  often find ourselves too lazy to deal with the whole rigamarole of uploading photos.  A blog post with no pictures is very sad, but a post with an iPhone picture?  I can live with that now and then.

Four months into our new lives as adults with two jobs, a mortgage, car payments, and the like, we’ve settled into a routine.  Well, as much of a routine as we can muster with Dylan’s surgical intern schedule.  Given the fact that they literally hold lives in their hands, it is more than a little alarming to think about the hours that surgeons keep and the chronic sleep deprivation they face.  They are now limited to 80 hours of work per week, but in generations past, no such protections existed.  Rest assured, your surgeon can no longer legally work more than a 27 hour shift.  Is that reassuring? Just wondering…

In any case, Dylan is often on call on the weekends, meaning that he goes in to work at about 5 am on Saturday and arrives home in a semi-stupor in the late morning on Sunday.  He is usually in charge of putting together delightful Sunday breakfast treats, but on those mornings, he is often barely functional.  So Maddie and I are now in charge and we try to pull something together right before he gets home so that its hot and ready to eat.  (My, don’t I sound domestic!)

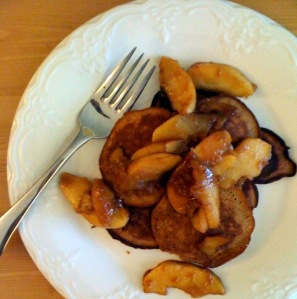
Tis the holiday season, of course, and so this past weekend I dug into the Epicurious archives and found this recipe for gingerbread pancakes with butterscotch apples.   I wouldn’t blame you if your teeth started aching just looking at the photo and the recipe- this is definitely not the meal for those who prefer their breakfasts savory.  But for those of us who love a good pancakes with a little autumnal flair, these gingerbread pancakes with their yummy apple topping are worth it. And while I don’t know Sara Moulton, who first authored this recipe, I can fully support putting a sweet breakfast treat in a cookbook on weeknight meals. Breakfast, lunch, or dinner, these are a winner.

Gingerbread pancakes with butterscotch apples (serves 2-4)
(from Sara’s Weeknight Meals by Sara Moulton via Epicurious)

Ingredients:

2 tablespoons unsalted butter
2 large Golden Delicious apples (about 1 pound), peeled and sliced
1/4 cup packed light brown sugar
1 tablespoon fresh lemon juice
1 1/4 teaspoons ground cinnamon
1/2 teaspoon table salt
1 1/2 teaspoons vanilla extract
3/4 cup unbleached all purpose flour
1/4 cup granulated sugar
1 1/2 tablespoons ground ginger
1/2 teaspoon baking powder
1 large egg
3 tablespoons molasses
3 tablespoons vegetable oil, plus more for cooking the pancakes

1. Preheat the oven to 200°F. Melt the butter in a large skillet over medium heat. Add the apples and cook, stirring occasionally, until tender, about 10 minutes. Stir in the brown sugar, 2 tablespoons water, the lemon juice, 1/4 teaspoon cinnamon, and 1/4 teaspoon salt. Cook until the mixture bubbles. Remove from the heat and stir in the vanilla; transfer to a serving dish and set aside.

2. Meanwhile, in a small bowl stir together the flour, granulated sugar, ginger, remaining 1 teaspoon cinnamon, the baking powder, and remaining 1/4 teaspoon salt in a small bowl. Combine 1/4 cup water, the egg, molasses, and 3 tablespoons oil in a glass measuring cup; add to the flour mixture and stir with a fork until the mixture is just combined but not smooth. Add additional water if necessary to reach the consistency of pancake batter.

3. Brush a nonstick skillet with a little oil; heat over medium-low heat. Add the gingerbread mixture to the skillet a generous tablespoonful at a time and spread to make a 2 1/2-inch round; cook until lightly browned, about 3 minutes. Turn and brown on the other side, 3 to 4 minutes. Repeat until all the batter has been used. Keep the pancakes warm in the oven until all have been cooked.

4. To serve, divide the pancakes among dessert plates and top each serving with some of the apples.


Banana pecan muffins February 23, 2009

Filed under: baked goods,breakfast,food — superspark @ 10:13 pm

banana-pecan-muffins

Pasadena hosted its first ever marathon in November.  Well, almost.  After years of planning, not to mention hours and hours of training by the athletes, the marathon was cancelled just hours before the start due to poor air quality.  Here in Southern California we can rarely complain about the weather, but an unfortunate coincidence of events had sparked a rash of wildfires, leaving the air thick with ash and smoke. The runners were annoyed and disappointed, to say the least.

Before I say another word, I should dispel any notions that I was among those hopeful runners.  Although I am a recreational runner, Dylan is the marathoner in the family- I have no such aspirations and feel quite strongly that my body just was not made to endure that sort of challenge.  But I am a valiant supporter and when Dylan’s running group spread the word that the marathon had been cancelled that morning, deciding instead to hold an impromptu potluck brunch, I figured that warm, homemade muffins could go a long way towards remedying their disappointment.

Turns out I wasn’t the only one with muffins in mind- there were at least two other varieties, but I happen to think this recipe, from Mark Bittman’s How to Cook Everything, is a particularly nice one.  Unlike a lot of muffins, this one is only mildly sweet, not so saccharine as to be mistaken for dessert.  In fact, the brunch’s host, Marie-Helene, usually forswears dessert, declaring herself more of a savory person, but she asked me to leave a few of the muffins for her to snack on later in the day.  With everything ready to go from the pantry aside from a frozen banana, these muffins were quick, simple, and perfect for the occasion.

Banana pecan muffins (makes 8 large or 12 medium muffins)

Ingredients:

3 tbsp melted butter or canola or other neutral oil, plus some for greasing muffin tin
2 cups all purpose flour
1/4 sugar, or to taste (or replace with honey or maple syrup)
1/2 tsp salt
3 tsp baking powder
1 egg
1 cup very ripe mashed banana
1/4 cup milk, plus more if needed
1/2 cup roughly chopped pecans (or other nuts)

1. Preheat the oven to 400.  Grease a standard 12-compartment muffin tin.

2. Mix the dry ingredients in a bowl (including the nuts).  Beat together the egg, milk, banana, and butter or oil.  Make a well in the center of the dry ingredients and pour the wet ones into it.  Combine the ingredients swiftly, stirring and folding rather than beating, and stopping as soon as the dry ingredients are moistened.  The batter should be lumpy and thick, but quite moist. Add more milk if necessary.

3. Spoon the batter into muffin tins, filling them about 2/3 full and handling the batter as little as possible.  Bake 20-30 minutes or until nicely browned and a toothpick inserted into the center of one comes out clean.  Remove from over and let rest for 5 minutes before taking them out of the tin. Serve warm.


Zucchini ricotta frittata May 30, 2008

Filed under: breakfast,food,veggies — superspark @ 6:34 am

My mom came out to California to visit for only the second time ever last weekend, the first being for our wedding a couple of summers ago. Although she has travelled around Europe a fair bit (especially in the wilder days of her youth) and has been up and down the Eastern seaboard countless times, she had never made it west of the Mississippi river, aside from these two trips to visit me. Crazy, no? So I felt obliged to entertain her a bit- took off a couple of days from work, made plans for a belated Mothers’ Day celebration, and so forth. How unfortunate, then, that a massive heat wave struck seemingly the moment she stepped off of the plane, derailing all outdoor activities.

Instead we turned to movies, to Pinkberry, and to cooking. Like many moms, mine has cooked dinner pretty much every night in recorded history. My dad is a hot dogs and beans sort of cook, when left to his own devices, which explains why my mom single-handedly made dinner for all of us every night during my childhood. As she’ll admit, she’s not a particularly ambitious cook, but even if you’re just making pasta or chicken breasts, doing it night after night becomes a little grueling. So I figured this visit was a good opportunity to let her put her feet up and relax while I took care of the cooking.

Of course, our diets are just about as dissimilar as can be. She steers clear of carbs, especially anything with wheat or corn, while I couldn’t imagine life without bread, pasta, potatoes, etc… With that in mind, I tried to plan our menus around the proteins that she prefers- eggs, chicken, and fish- and decided on this frittata, originally published here on Simply Recipes, for our first evening’s meal.

Mom declared that this was the best frittata she’s ever had and although it may have been the fact that she didn’t have to make it that caused her to utter such superlatives, I’d agree that it was pretty great. It had lots of flavor thanks to the herbs and a generous helping of olive oil as well as a lovely texture from the cheese and egg mixture. She asked for the recipe not once but twice over the course of the weekend so that she could recreate it at home. I’d call that a success- thanks to Elise at Simply Recipes for such a tasty meal.

Zucchini ricotta frittata (serves 4)

Ingredients:
6 large eggs
1/2 cup ricotta cheese
1/3 cup freshly grated Parmesan cheese
1/4 teaspoon salt
Freshly ground black pepper to taste
1 Tbsp chopped fresh basil
1/2 teaspoon chopped fresh thyme
1/4 cup extra virgin olive oil
2 small zucchini, or one larger one, washed and sliced into thin rounds (about 3/4 pound)

1. Beat the eggs in a medium bowl. Add the ricotta and Parmesan and beat to combine. Add the salt, freshly ground black pepper, basil and thyme and beat to combine. Set aside.

2. Heat the olive oil in a 10-inch oven-proof stick-free skillet on medium high. When the oil is hot and begins to shimmer, add the zucchini slices. Stir so that the zucchini slices are all coated with some of the oil. Cook, stirring only occasionally (if you stir too much the zucchini won’t brown), until the zucchini slices are lightly browned, about 5-6 minutes. Remove from heat. Remove zucchini slices from the pan with tongs or a slotted spoon to a bowl. Let cool for 30 seconds or so, and then stir the zucchini slices to the egg mixture.

3. Reheat the skillet. There should be a couple of tablespoons of oil left in the pan, if not, add some. When the oil is hot, pour the egg mixture into the pan. Do not stir it. Reduce the heat to medium. Let the egg mixture cook. Run a spatula along the edge of the frittata, separating the cooked edges from the pan. Let the egg mixture cook until the bottom is golden brown and the top is beginning to set, about 5-6 minutes.

4. Set the top rack 5 inches from the heating element in the oven. Preheat the oven broiler. Once the top of the frittata has started to set in the pan on the stove top, remove the pan from the stove and place it in the oven. With the broiler on, the door of the oven needs to be open. You can let the pan’s handle stick out from the oven through the open door. Cook under the broiler until the top starts to become lightly browned, about 2 minutes.

Alternatively, instead of using the broiler, you can place a plate face-down on top of the skillet. Flip the skillet over to release the frittata on to the plate. Then slide the frittata from the plate back on to the skillet. Let cook for a couple of minutes more until the bottom side gets browned.

5. Slide the frittata out of the skillet onto a serving plate. Let cool for a minute or two and serve.


Bittersweet mocha coffee cake May 12, 2008

Filed under: baked goods,breakfast,Dessert,food — superspark @ 6:02 am

bittersweet-mocha-coffee-cake.jpg

This is one of those instances where you don’t get what you were expecting, but in the end, you’re more than happy with what you got. Dylan and I were headed to a brunch with his medical school friends several weeks ago and were debating what to bring along. He is known for his baked french toast, which is always made with some sort of sweet, tender fruit on the bottom. (Though I’m most definitely a sweet breakfast person, I’ve never been a fan of french toast until his, which is moist and creamy, but not eggy or soggy.) But there are only so many french toasts a person can eat before wanting to mix it up a bit. We debated crepes (too much labor for a big crowd), a frittata (meh), and scones (best right out of the oven and hence not as good for taking to a brunch 35 minutes away).

Flipping though Mollie Katzen’s Sunlight Cafe, a cookbook devoted entirely to brunch foods, he came across this bittersweet mocha coffee cake, which we agreed sounded too good to pass up. Now, when I envision a coffee cake (bittersweet mocha or otherwise), I picture something of the more traditional variety, with a large, moist crumb and always with some sort of fabulous sugary, crumbly topping. Isn’t that crumble topping pretty much a requisite of coffee cake? So when Dylan pulled this dark, chocolatey, and decidedly crumb-free cake out of the oven, I’ll admit I was a little shocked. I wouldn’t say disappointed, exactly, (because one tiny taste of a bit that had fallen off revealed that “disappointed” is not a word to be used with this cake) but surprised.

I think most would agree that this is not a traditional coffee cake, but it is dense and chocolatey, with just a hint of mocha flavor. The chocolate chips melted throughout the cake, settling towards the bottom to create a particularly decadent and gooey layer. It didn’t seem out of place as a sort of dessert for the brunch, but with a light glaze on top, I think it could be equally appropriate for a full-on dinner dessert. In the end, nearly the entire cake had been consumed by the hungry med students, always a good sign, and we happily left the remaining chunk with the hosts.

Bittersweet mocha coffee cake (12 or more servings)

Ingredients:

non-stick spray
1 cup (2 sticks) unsalted butter, softened
1 1/4 cups sugar
4 large eggs
1 tbsp vanilla extract
2 cups unbleached all-purpose flour
1/3 cup unsweetened cocoa
1/2 tsp salt
1 1/2 tsp baking powder
3/4 cup strong brewed coffee
1/4 cup milk
1 cup semi-sweet chocolate chips

1. Preheat oven to 350. Lightly spray bottom and center of a standard-sized tube pan or Bundt pan with non-stick spray.

2. In a large bowl, beat the butter for several minutes with an electric mixer at high speed. Add the sugar and beat for several minutes longer. Add the eggs one at a time, beating well after each, and then beat in the vanilla.

3. In a second bowl, combine the flour, cocoa, salt, and baking powder, slowly mixing them together with a whisk. Combine the coffee and milk in a measuring cup with a spout.

4. Add the dry ingredients to the butter mixture in 3 installments, alternating with the coffee mixture, beginning and ending with the dry (dry-wet-dry-wet-dry). After each addition, use a spoon or rubber spatula to sir from the bottom of the bowl just enough to blend. Fold in the chocolate chips with the last addition of flour. Don’t overmix.

5. Transfer the batter to the prepared pan, spreading it evenly into place. Bake in the middle of the oven for 45 to 50 minutes or until a sharp knife inserted all the way into the center comes out clean. Cool for at least 30 minutes before removing the cake from the pan. Then invert it onto a plate (if you used a Bundt pan) or pull out the tube and gently lift the cake off and onto a plate (if it’s in a tube pan). Cool for another 10-15 minutes before slicing.


Buttermilk corn cakes March 30, 2008

Filed under: breakfast,food — superspark @ 7:04 pm

buttermilk-corn-cakes.jpg

The eternal question in the bruncher’s mind? Sweet or savory? It’s often a no-brainer- those fluffy golden waffles are just calling your name or you can’t think of anything but that pillowy omelet with sizzling hash browns. Other times, the choice just isn’t so obvious…maybe you want sweet, maybe a little savory, maybe somewhere in between.

The beauty of these buttermilk corn cakes, from Mollie Katzen’s Sunlight Cafe lies in their versatility, their ability to go sweet or savory in a split second. Just as corn bread can be equally at home with butter and jam as with chili, so these corn cakes take to whatever topping you put on them, much more so than an ordinary wheat flour pancake. Case in point, as I was whipping up a batch of these corn cakes the other weekend, I went through the fridge pulling out condiments we might like to try on them, ending up with no less than a dozen items. From syrups to jams to butter to sour cream to fresh salsa, all of them seemed right at home atop these fluffy little beauties. I ended up stumbling upon two favorite topping combinations: first, a dollop of sour cream with fresh strawberry jam and second, sour cream with a heaping spoonful of salsa. Should you decide you want to take them in a decidedly more savory direction, Katzen suggests adding corn kernels and jalapenos to the pancake batter. I’ll admit, I’m intrigued, but for sheer versatility and simplicity, these buttermilk corn cakes are a perfect pick.

Buttermilk corn cakes (about ten 4-1/2 inch pancakes, enough for 2-3 people, depending on how hungry you are)

Ingredients:

1/2 cup cornmeal
1/2 cup unbleached all-purpose flour
1/2 tsp salt
1 tsp baking powder
1/2 tsp baking soda
1 tbsp sugar
1 cup buttermilk
2 large eggs
1 tsp vanilla extract
1 tbsp unsalted butter, melted
nonstick spray
butter for the pan (optional)

1. Combine the dry ingredients in a medium-sized bowl.

2. Measure the 1 cup buttermilk into a 2-cup liquid measure. Add the eggs and beat gently with a fork or a small whisk until thoroughly combined. Beat in the vanilla.

3. Pour the buttermilk mixture, along with the melted butter, into the dry ingredients. Using a spoon or a rubber spatula, stir from the bottom of the bowl until the dry ingredients are all moistened. Don’t overmix; a few small lumps are okay.

4. Place a griddle or a skillet over medium heat. After a minute or two, spray it lightly with nonstick spray, and if you like, melt in a little butter. Using a 1/4-cup measure with a handle, scoop up batter and pout it onto the hot griddle.

5. Cook the pancakes for 3-4 minutes on the first side, or until really golden on the bottom. (Don’t turn them too soon. The trick is to flip them only once, which keeps them light and tender.) The second side will go a little faster, 2-3 minutes, depending on the heat.

6. Serve right away with your chosen toppings.


Pumpkin ginger nut muffins March 14, 2008

Filed under: baked goods,breakfast,food — superspark @ 5:57 am
pumpkin-ginger-nut-muffins.jpg
Are you ever haunted by the things in your freezer? Being a self-avowed non-food-waster, except under the most dire circumstances (like a recent spicy chick pea dish that ended up so salty it literally hurt to eat it), I’m forever freezing smidges of this and bits of that. Once my leftover ingredients get tucked into the freezer, however, it can be a little more difficult to remember what’s in there, which reminds me of some lemongrass that I have totally forgotten about, but I digress… In a particularly organized moment a while back, I not only saved a cup of pumpkin puree (leftover from a dish long forgotten), but managed to put a note on the refrigerator to remind me of its presence. A great system, for I certainly remembered that the pumpkin was in there, but just couldn’t come up with anything I wanted to cook that required precisely one cup’s worth. With spring cresting here in Los Angeles, it’s hard to motivate to make anything autumnal, and what says fall more than pumpkin?
But in the end, my conservatory urges, that little voice inside my head telling me not to let food go to waste, won out and I decided to make this recipe for recipe for pumpkin ginger nut muffins posted by Elise of Simply Recipes. I tag a lot of baked goods as I peruse my list of blogs each day with the best of intentions to make them, but in the end I rarely get around to it, talking myself out of them as unhealthy and unnecessary. Do I really need to bring 15 muffins into my life when I’m surviving perfectly well on oatmeal and cereal? In this case, yes. They were delicious- a decidedly pumpkin flavor studded with chopped pecans and the occasional chunk of candied ginger. Fresh out of the oven, they were good enough to eat for dessert, but are probably ideally made right before a big brunch with friends. With almost no labor involved, you’ll have your nearest and dearest ooh-ing and aah-ing over the fruits of your labors. In our household of two, it’s a little harder to make it through an entire batch quickly…after several days of scarfing down muffins whenever the opportunity arose, I bundled the remaining handful up and put them where else, but the freezer. They’ll be a real treat defrosted and lightly toasted with butter one morning…should we remember they’re there.
Pumpkin ginger nut muffins (makes 12-15)
Ingredients:
1. Preheat oven to 350. In a medium sized bowl, sift together the flour, salt, sugar, and baking soda.
2. Mix the pumpkin, melted butter, eggs, 1/4 cup of water, and spices together, then combine with the dry ingredients, until just incorporated. Do not over-mix. Fold in the candied ginger and chopped nuts.
3. Spoon mixture into a prepared muffin tin. Bake for 25-30 minutes (mine were done in more like 20 minutes). Check for doneness with a toothpick inserted into the center of a muffin. If it comes out clean, they’re done. Cool on a rack.
 

My latest granola February 25, 2008

Filed under: breakfast,food,grains — superspark @ 7:30 am

orangettes-granola.jpg

For someone who eats oatmeal for breakfast five days out of seven, I’m a little granola obsessed. I don’t get the opportunity to eat it that often (just weekends or perhaps for a little dessert in the evenings), and I never buy it premade so there usually isn’t any around the house, but in the year or so that I’ve been posting on Superspark, I’ve made no fewer than four different granola recipes now in search of the perfect blend of sweet oatey clusters, nuts, and dried fruit.

The first attempt, a bare bones recipe from the New York Times which I called simply “crunchy granola” (little knowing that I’d soon need to distinguish it from 3 other competitors), was good, but there wasn’t a cluster to be found. Wising up to the realization that all granola recipes are not created alike, I searched Epicurious for one that loudly advertised clusters in the results, ending up with what I called “granola redux”, a pleasantly vanilla-infused variation that required forming the granola into a bar and freezing it to coax the oats into sticking together. A little involved and though the taste was great, the freezing trick didn’t produce the results I was hoping for. Take three, so-called Caolionn’s kick-ass granola after the friend who passed along the recipe, was a big step up from the others and was definitely worth making again.

But you know what? When Molly of Orangette posted her go-to daily granola recipe recently, it seemed worth a try, if only for the sake of further research. The woman’s got good taste and I had a sense she wouldn’t steer me wrong. This particular granola, adapted from Nigella Lawson’s Feast, has an ingredient list (including brown rice syrup, sesame seeds, sunflower seeds, and apple sauce) that puts it a bit more on the “earth mother” side of the granola spectrum. But those flavors give this granola a deeper, richer flavor than those that rely on honey or sugar for most of their sweetening. Of course the all important question is whether it produces clusters. Indeed it does, because the wet ingredients end up forming a sticky paste to bind the nuts and oats together. Once again, it’s not as cluster-dense as the granola you’d buy at the supermarket (making me wonder what ungodly amounts of corn syrup must be added to them), but it’s definitely not just a bunch of flaky oats. All in all, definitely one to keep in the granola repetoire alongside Caolionn’s kick-ass granola. With some strawberries, plain yogurt, and a dollop of homemade jam, this is the kind of weekend breakfast that I dream about all week.

Daily granola (makes about 10 cups depending on how much nuts and fruit you add)

Dry ingredients:
5 cups rolled oats
2 to 3 cups raw almonds or pecan halves, or mixture of other nuts, chopped
1 cup hulled raw sunflower seeds
¾ cup sesame seeds (a surprisingly good addition, don’t skip them!)
¾ cup light brown sugar
2 tsp. ground cinnamon
1 tsp. ground ginger
1 tsp. salt

Wet ingredients:
¾ cup unsweetened apple sauce
1/3 cup brown rice syrup
¼ cup honey
2 Tbsp. vegetable oil, such as canola or safflower

optional: dried fruit, chopped, to taste (I used a combination of dried apricots, raisins, and dried mixed berries from Trader Joe’s)

1. Set racks in the upper and lower thirds of the oven. Preheat the oven to 300°F.

2. In a large bowl, combine all of the dry ingredients. Stir to mix well. In a small bowl, combine all of the wet ingredients. Stir to mix well. Pour the wet ingredients over the dry ones, and stir well.

3. Spread the mixture evenly on two rimmed baking sheets. Bake for 35 to 40 minutes, or until evenly golden brown. Rotate the pans and give the granola a good stir every 10 minutes or so to help it cook evenly. When it’s ready, remove the pans from the oven, stir well and set aside to cool. The finished granola may still feel slightly soft when it comes out of the oven, but it will crisp as it cools. Add chopped fruit, if so desired.

4. Scoop cooled granola into to a large zipper-lock plastic bag or other airtight container. Store in the refrigerator indefinitely.


Dried cherry and chocolate chip scones February 5, 2008

Filed under: baked goods,breakfast,Dessert,food — superspark @ 7:37 am

dried-cherry-and-chocolate-chip-scones.jpg

We’re not really a household that does much for Valentine’s Day, but for those who like to get all shmoopy with hearts, cupids, flowers, and the whole nine yards, here’s the way to start your day.  How thrilled would your loved one be to wake up to breakfast in bed? A hot cup of coffee (with foamed milk, naturally) or a mimosa, if that’s more your style, and the heart-shaped dried cherry and chocolate chip scones found here on Epicurious.  Yes, I realize that Valentine’s Day falls on a Thursday this year, giving most of us little time to frolic around baking in the morning and yes, I realize that the scones in the picture above are not, in fact, heart shaped.

I made this batch with entirely non-romantic intentions, bringing them to a baby shower last weekend, but it dawned on me that they’d be perfect for Valentine’s Day as well.  The recipe was actually written with instructions for making the scones in a heart shape, rather than the traditional wedge (as I did).  Instead of cutting the round of scone dough into triangles, just press the dough out a bit thinner and use a heart-shaped cookie cutter to make hearts for your sweetie.   Pretty cute idea, no?  As for the taste, the scones were the perfect medium between light and dense and were positively bursting with the tart dried cherries and rich chocolate chips.  Of course I’m partial, but of the four types of scones at the baby shower, I thought these ones turned out the best by far and they’ve garnered rave reviews on Epicurious.  So try them for V-day if you’re in the mood to spoil your loved one, or better yet, just spoil yourself on a lazy weekend morning.

Dried cherry and chocolate chip scones (makes 12)

Ingredients:

2 cups unbleached all purpose flour
1/3 cup sugar
1 teaspoon baking powder
1/2 teaspoon baking soda
1/2 teaspoon salt
7 tablespoons chilled unsalted butter, diced
1 teaspoon (packed) grated orange peel (optional)
3/4 cup miniature semisweet chocolate chips
3/4 cup coarsely chopped dried tart cherries
2/3 cup chilled buttermilk
1 large egg yolk
1 teaspoon vanilla extract
1/4 teaspoon almond extract (optional)

Milk (for glaze, optional)
Sugar (to sprinkle on top, optional)

1. Preheat oven to 400. Butter and flour baking sheet (or use Silpat). Whisk 2 cups flour, 1/3 cup sugar, baking powder, baking soda, and salt in large bowl. Add butter and grated orange peel; rub in with fingertips until coarse meal forms. Mix in chocolate chips and dried cherries.

2. Whisk buttermilk, egg yolk, vanilla extract, and almond extract in small bowl to blend. Add buttermilk mixture to dry ingredients; stir with fork until dough comes together in moist clumps.

3. Gather dough into ball. If cutting into triangle, press dough out on lightly floured surface to 1-1/2 inch thickness. Cut circle into 12 slices. If cutting into heart shapes, press out dough on lightly floured surface to 3/4-inch thickness. Using 2-inch heart-shaped cookie cutter, cut out scones. Gather scraps, press out dough and cut out additional scones.

4. Transfer to baking sheet, spacing 1 inch apart. (Can be made 1 day ahead. Cover; chill.) Preheat oven to 400°F. Brush scones lightly with milk; sprinkle with sugar. Bake until scones are crusty on top and tester inserted into center comes out clean, about 15 minutes (or up to 20 minutes if refrigerated). Serve warm or at room temperature.